 |
| Despite the permanent row system working out so well that we decided to expand them, it appears something is still missing out there... |
 |
| Yep. There. Right there. That big strip of grass between the Asparagus and Blackberry beds and the garden itself. It needs a greenhouse! |
 |
| While my plan is to phase out tiller use entirely, our hard-pan soil clay soil won't let us retire the old gal just yet. We tilled the spot multiple times over the season, encouraging all the little weed seeds to sprout to their little heart's content, tilling them under again before going to seed. Had I a little bit of foresight, I would have sown a couple growths of cover crop, ending with a forage crop for the new laying hens I plan on growing out in here over it's first winter. Alas, foresight is not one of my better talents. |
 |
| Using a bunch of the free 3/4" electrical conduit Hub's got from work, we cut 3' off of the coupling end of each piece, which we pounded into the ground 2'. |
 |
| Our property is mildly sloped, and a hoophouse need not be perfectly level. On each coupling piece we made a mark for how far to drive it in, then used a 2x4 laid across the tops from one to the next to keep them roughly straight across. |
 |
| Laying out the arches and deciding on the fly just how big we wanted this monster to be. |
 |
| Always hire competent help and be sure to pay them well. For four year old boys, I highly recommend a steady income of matchbox cars and a personal pile of dirt to bury them in. Someone should really pay more attention to this poor child however, I think his hoody is on backwards! |
 |
| The hoops are up! The cross bars are glued in place utilizing "cross" fittings from the plumbing department. Grey electrical pipe holds up better to the sunlight than the white plumbing kind, but in the smaller sizes electrical and plumbing pipe sizes are interchangeable, and they don't make the crosses in grey. |
 |
| Our model for scale, sporting his fixed hoody. |
 |
| We used 2x4 to frame the ends and enable a hinged door, we also used strapping to add a support brace along the sides, which will eventually hold the sides rolled up during the summer...we hope. We haven't engineered that little issue yet. |
 |
| In my internet travels I came across a raised bed cloche how-to, which the author described his problem with snowfall collapsing his arches until he added a two inch ridge along the top. Well, if some is good, more is better. Right? We one hole strapped a 2x4 on it's side for our ridge, and so far she seems to be shedding snow like a boss, granted we've only had 3" so far, but it seems to be working! |
 |
| I thought I'd save money by using builders roll plastic one the ends...big mistake. Within a week it was already causing problems. The builders 3 mil stuff might only be a single mil thinner than the greenhouse film we covered the arches with--but that single little mil makes a HUGE difference. |
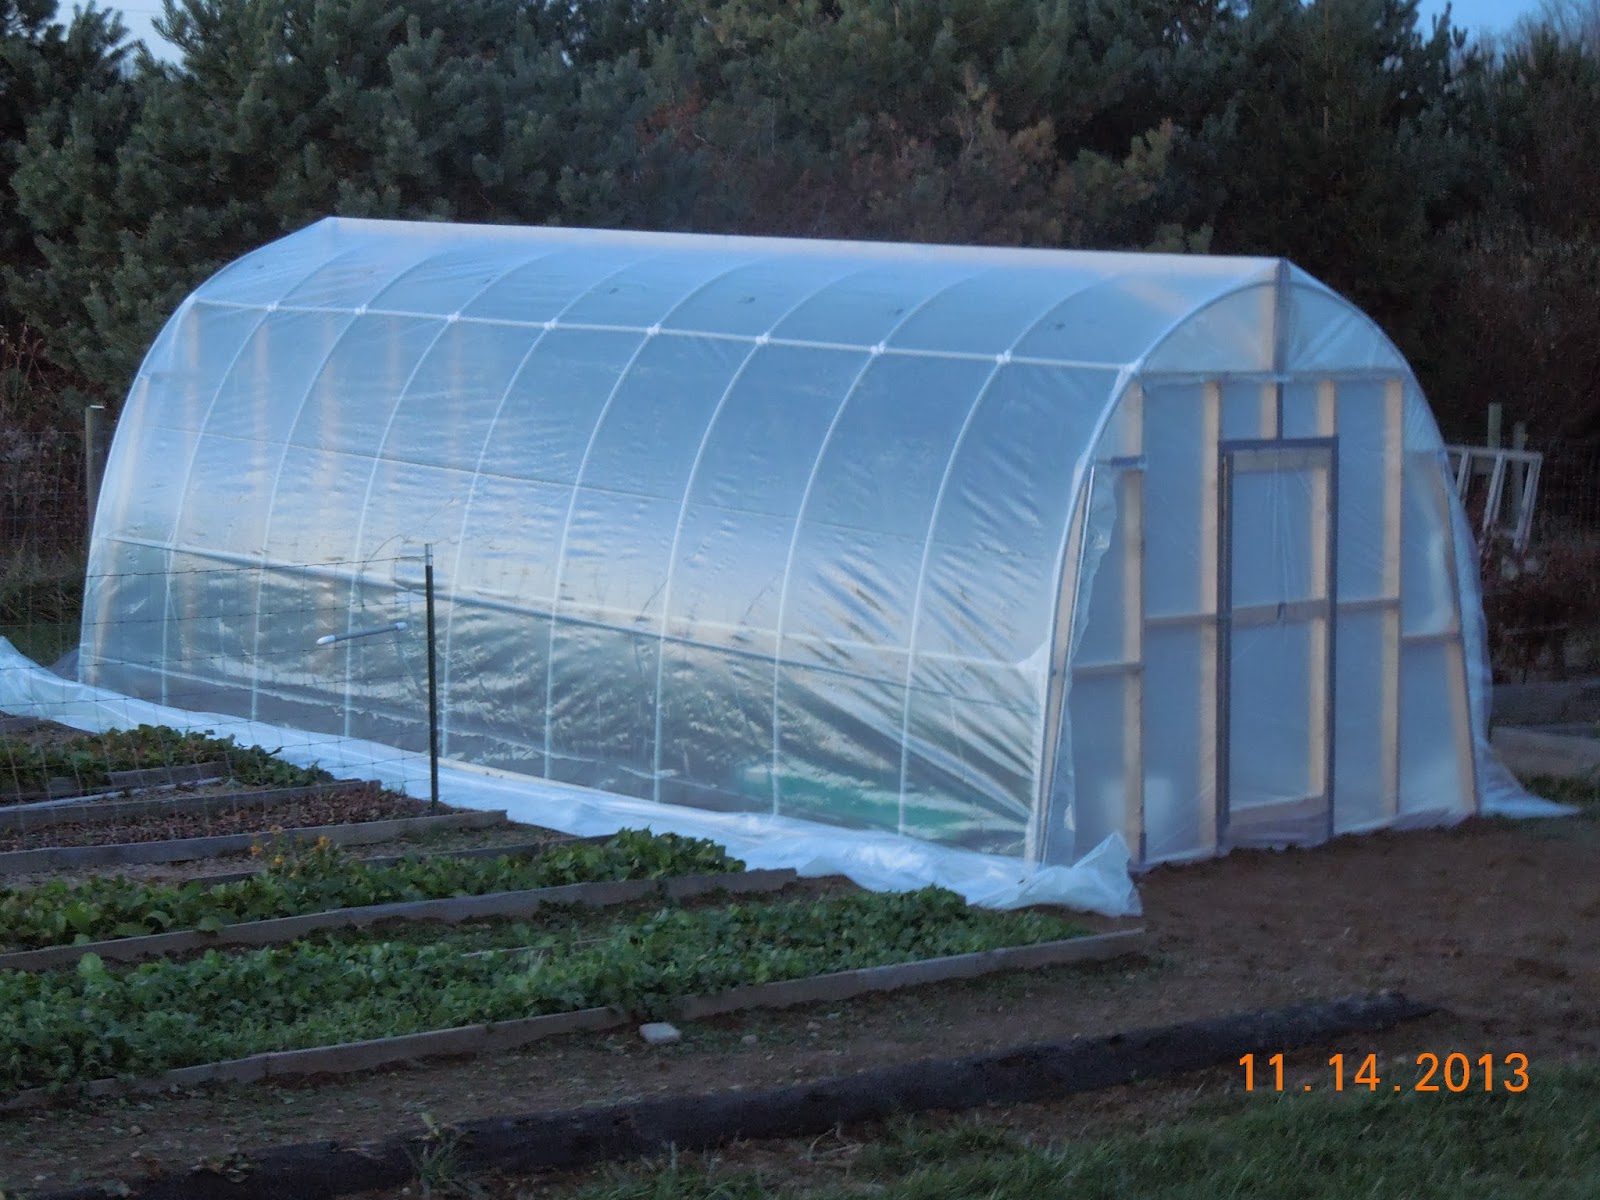 |
| We bought the arch piece of greenhouse film from Ag Solutions, and it ended up cheaper than the roll of junk! Any guesses as to what we'll be changing out next spring? |
 |
| Along the bottom is 1x3 board which the greenhouse film is stapled to. |
 |
| The chicks are loving it, along with the leaves we gave them to use as bedding. The leaves will be shredded by them and mixed with their droppings to make a nice rich humus in our crappy soil. During the day it's running about 20°F or more above outdoor temps. With nothing to hold the heat but a handful of growing chicks though the night the temps stabilize and mirror outside temperature. With a couple of heat sinks, black barrels of water or an actual heated aquaponics set up, she should hold much better. |
Hop on over to the Homestead Barn Hop for lots more great posts from some really awesome blogs!
